Build your own AI Coding Assistant with Databricks using Visual Studio Code and GitHub Copilot
Tools built with large language models are revolutionizing the way we interact with systems and GitHub Copilot, powered by OpenAI’s Codex, is a great example. Particularly, paired with all the nice features developers love about Visual Studio Code, Copilot offers a compelling developer experience.
However, to build and deploy AI based systems such as GitHub Copilot, you need a lot more than a code editor and an intelligent coding assistant. You can fill this gap with the Databricks extension for VS Code. With this, a developer can develop entirely in VS Code while using Databricks compute and deploy models to Databricks. This ensures the development process and the model serving are scalable and governed. Also, you can still leverage Copilot to enrich your coding process.
In this blog, I will walk through how you can build your own AI coding assistant BrickPilot (😁) with Visual Studio, GitHub Copilot and the Databricks extension for Visual Studio Code. The Databricks Extension enables all the code you develop on VS Code to seamlessly run on Databricks compute clusters (or it could be a single machine with plenty of memory, if that’s what’s needed) and facilitates logging of models with MLFlow. You can then deploy these models to Databricks Model Serving which provides the actual ‘brains’ of the system you build (without you having to maintain any of the model serving infrastructure).
It’s kind of meta when you think about it. Building an AI coding assistant (BrickPilot) using an AI coding assistant (GitHub Copilot) on a platform that is built to make all things Data and AI easier (Databricks), while writing all the code you need in your favorite code editor (VS Code).
The code for this blog is in this repository.
Here are the steps to go from 0 to BrickPilot:
Install and set up Databricks Extension for VS Code

Search for the Databricks extension from Databricks (the top one you get when you type in ‘Databricks’ in the text box). Install it, restart VS Code, and configure it (connect it to your Databricks workspace) by following the steps given here. The steps for getting a Databricks personal access token, which you will need for this process, is given here. It is a one time set up and would take no more than 5 minutes. This blog also does a great job highlighting the Databricks + IDE developer experience.
Install and set up GitHub Copilot
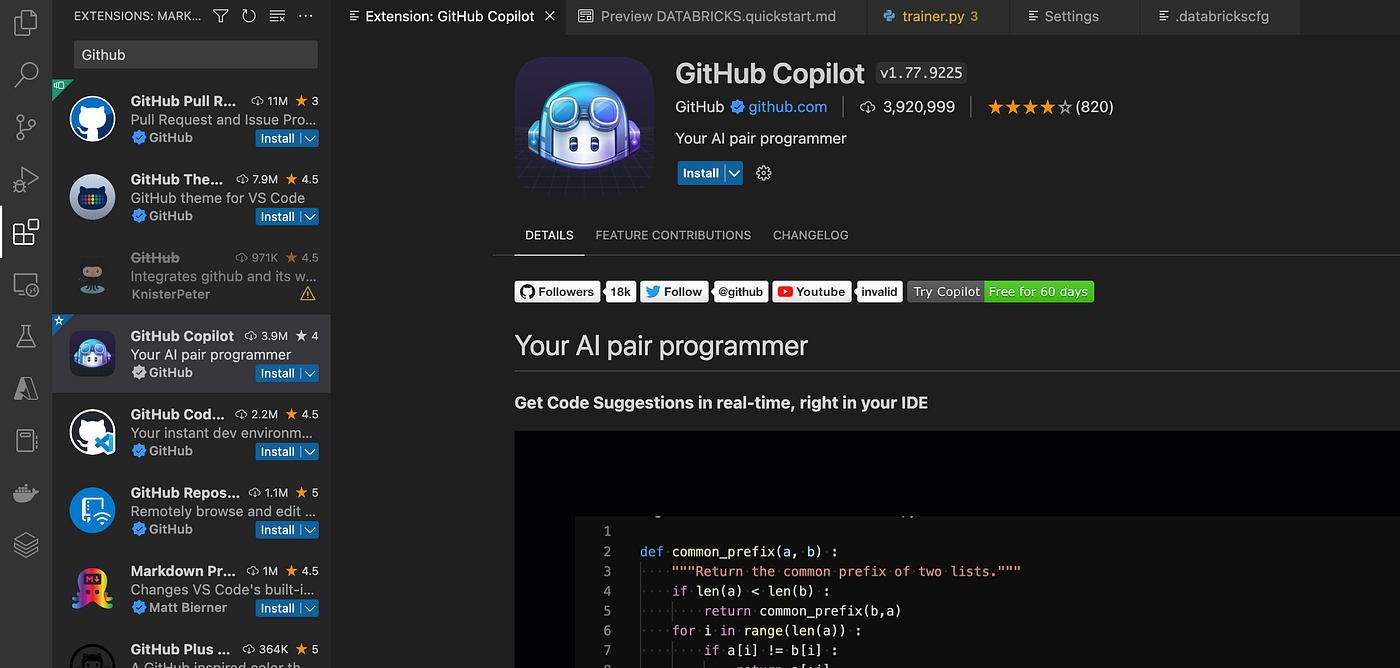
Search for GitHub Copilot, install the extension (you will be redirected to either pay or start the free trial) and restart the editor as before. You don’t need to have this to work with the Databricks extension for VS Code, but it definitely is nice to have Copilot chip in with some quick code snippets.
Figure out what we want BrickPilot to do
Needless to say, it’s impossible to walk through building a near-perfect Copilot clone in a single blog that anyone will want to read in one sitting. However, at the very least, in this toy incarnation, we do want BrickPilot to do 2 things:
- Generate code when prompted with text. i.e. program synthesis
- Explain a given code snippet
For #1, in this blog I use CodeT5 (particularly, the codet5-large-ntp-py checkpoint) an encoder-decoder model fine-tuned to generate python code. With a few lines of code, I can pull this model from the Hugging Face Hub and it’s ready to use. I use the transformers library from Hugging Face to do this.
from transformers import AutoTokenizer, T5ForConditionalGeneration

tokenizer = AutoTokenizer.from_pretrained("Salesforce/codet5-large-ntp-py")
model = T5ForConditionalGeneration.from_pretrained("Salesforce/codet5-large-ntp-py")
For explaining code, I use yet another checkpoint (a set of weights) of CodeT5 fine-tuned for code summarization tasks (codet5-base-multi-sum).
from transformers import RobertaTokenizer, T5ForConditionalGeneration

tokenizer = RobertaTokenizer.from_pretrained('Salesforce/codet5-base-multi-sum')
model = T5ForConditionalGeneration.from_pretrained('Salesforce/codet5-base-multi-sum')
Now we have the models for both tasks, but how do we serve these models for inference? i.e. deploy them such that they can be leveraged via an API call.
Leverage Model Serving on Databricks
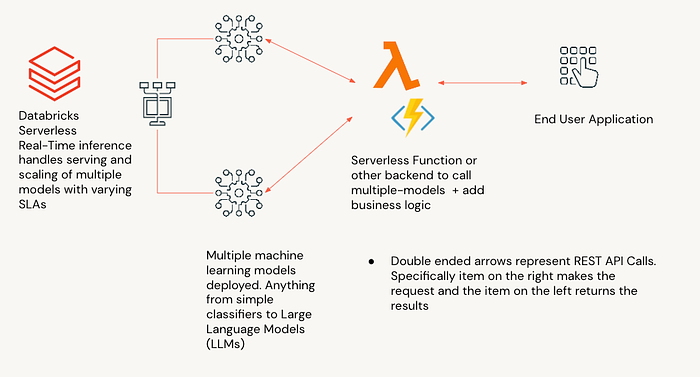
Databricks Model Serving lets you deploy your models to managed infrastructure (so that you don’t have to turn any knobs) that scales horizontally and exposes them as REST API endpoints. The compute resources backing the endpoint scale up and down based on the volume of requests. Among other things Databricks Model Serving does for you, it provides you with a number of dashboards that monitor the health of the endpoint and keep track of what’s going on.
In order to use this capability, we have to store the pre-trained models as MLFlow models. Once this logging of the models is done, it literally takes 3 clicks to deploy the model to a scalable endpoint. The first step in this process is to create a custom model that encapsulates the inference logic for your model.
The code for the code generation model is as follows:
import mlflow.pyfunc

class CodeGenerator(mlflow.pyfunc.PythonModel):

  def load_context(self, context):
    from transformers import AutoTokenizer, T5ForConditionalGeneration
    self.tokenizer = AutoTokenizer.from_pretrained(context.artifacts['tokenizer'])
    self.model = T5ForConditionalGeneration.from_pretrained(context.artifacts['model'])

  def predict(self, context, model_input ):
    import json
    texts = model_input.iloc[:,0].to_list() # get the first column
    input_ids = self.tokenizer(texts, return_tensors="pt").input_ids
    # simply generate a single sequence
    generated_ids = self.model.generate(input_ids, max_length=512)
    generated_code = self.tokenizer.decode(generated_ids[0], skip_special_tokens=True)
    result = {'code': generated_code}
    return json.dumps(result)
For the code explanation/summarization model:
import mlflow.pyfunc

class CodeExplainer(mlflow.pyfunc.PythonModel):

  def load_context(self, context):
    from transformers import RobertaTokenizer, T5ForConditionalGeneration
    self.tokenizer = RobertaTokenizer.from_pretrained(context.artifacts['tokenizer'])
    self.model = T5ForConditionalGeneration.from_pretrained(context.artifacts['model'])

  def predict(self, context, model_input ):
    import json
    texts = model_input.iloc[:,0].to_list() # get the first column
    input_ids = self.tokenizer(texts, return_tensors="pt").input_ids
    # simply generate a single sequence
    generated_ids = self.model.generate(input_ids, max_length=64)
    generated_code = self.tokenizer.decode(generated_ids[0], skip_special_tokens=True)
    result = {'explanation': generated_code}
    return json.dumps(result)
Next we can log the model using MLFlow. While the code below is for the code generation model, the process is identical for the code summarization model.
import cloudpickle
import mlflow.pyfunc
from sys import version_info

#Example input such that it can be passed to the model

PYTHON_VERSION = "{major}.{minor}.{micro}".format(major=version_info.major,
                                                  minor=version_info.minor,
                                                  micro=version_info.micro)

payload_pd = pd.DataFrame([["# Function to print hello world"]],columns=['text'])
input_example = payload_pd

conda_env = {
    'channels': ['defaults'],
    'dependencies': [
      'python={}'.format(PYTHON_VERSION),
      'pip',
      {
        'pip': [
          'mlflow',
          'transformers',
          'pandas',
          'cloudpickle=={}'.format(cloudpickle.__version__),
          'torch'],
      },
    ],
    'name': 'code_env'
}

mlflow_pyfunc_model_path = "<model-path>" #could be an aribitrary string like 'codegen'

mlflow.set_experiment("/Users/<user-name>/<existing-subdirectory>/<desired-name-for-experiment>")

with mlflow.start_run(run_name="brickbots_run") as run:
    mlflow.pyfunc.log_model(artifact_path=mlflow_pyfunc_model_path, python_model=CodeGenerator(),artifacts=artifacts,
            conda_env=conda_env, input_example = input_example)
Just to remind you that we are doing all this within VS Code with Copilot helping us write a good chunk of the code:
At this point you can do everything in VS Code and use the MLFlow Python API and the Model Serving API. For the sake of this example, I will use the UI to register the model and deploy the model endpoint.
Here, you can see how Copilot makes some pretty accurate suggestions, the developer edits a few things and runs it directly on Databricks with a click of a button.
Once you run this, you can go to the experiments tab in your Databricks workspace and locate the experiment.
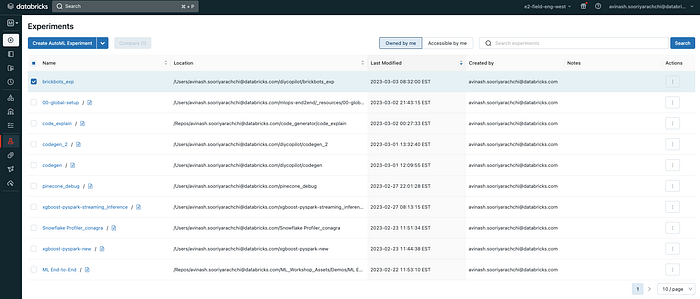
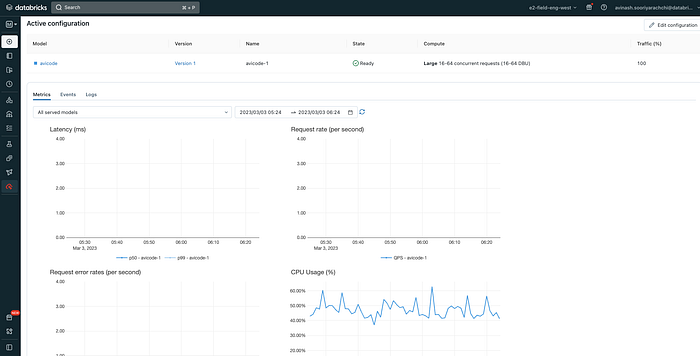
Then you can see all the runs you logged against this experiment. You can then go to the latest run, register the model and move it to the production stage in MLFlow. Then you can deploy the model for real-time inference to a serverless endpoint. Since we are deploying a large language model, you should select the ‘Large’ sizing to ensure enough memory is available. You can also see how we have the ‘scale to zero’ option to ensure optimum resource consumption when there are no queries hitting the endpoint. The underlying infrastructure will scale right back up once requests are being made to the endpoint.
Now we have a model deployed. Since we logged an example with the model with MLFlow, we can see this in action in the UI itself.
The official documentation for Model Serving walks you through these details in a very clear manner and I encourage you to give it a read and try this feature out yourself.
Another nice thing about this UI is that it gives you the python wrapper code you need to call the API out of the box.

Note that you will need a Databricks Personal Access Token as you did before (for configuring the VS Code extension).
The process for deploying the Code summarization model is identical. You can use run the relevant code in the repo I’ve linked here and follow the exact steps as above (but with a unique name for the deployed model, MLFlow experiment etc.). Make sure to copy the url of that model’s endpoint as well.
Now we have two models deployed. To do some justice to our aspirations to build an AI Coding assistant, let’s organize the code such that it results in a cleaner interface for the end user and place it in a new file ‘BrickPilot.py’.
import os
import requests
import numpy as np
import pandas as pd
import json

class BrickPilot:

  def __init__(self, token, codegen_url, explain_url):
    self.token = token
    self.codegen_url = codegen_url
    self.explain_url = explain_url

  def create_tf_serving_json(self, data):
    return {'inputs': {name: data[name].tolist() for name in data.keys()} if isinstance(data, dict) else data.tolist()}

  def score_model(self, dataset, task):
    if task=='generate':
      url = self.codegen_url
    if task=='explain':
      url = self.explain_url

    headers = {'Authorization': f'Bearer {self.token}', 'Content-Type': 'application/json'}
    ds_dict = {'dataframe_split': dataset.to_dict(orient='split')} if isinstance(dataset, pd.DataFrame) else create_tf_serving_json(dataset)
    data_json = json.dumps(ds_dict, allow_nan=True)
    response = requests.request(method='POST', headers=headers, url=url, data=data_json)
    if response.status_code != 200:
      raise Exception(f'Request failed with status {response.status_code}, {response.text}')

    return response.json()

   #Compose the code generation function
  def generate_code(self, input):
    payload_pd = pd.DataFrame([["# " +input]],columns=['text'])
    result = self.score_model(payload_pd, 'generate')
    return print(json.loads(result['predictions'])['code'])

   #Compose the explanation function
  def explain_code(self, input):
    payload_pd = pd.DataFrame([["# " +input]],columns=['text'])
    result = self.score_model(payload_pd, 'explain')
    return print(json.loads(result['predictions'])['explanation'])
Now we can import this class from this file, instantiate it and use it as our DIY AI coding assistant in any coding environment. The following code show you how to import it, assuming BrickPilot.py is in the same directory. This assumes you store the Databricks token as an environment variable.
from BrickPilot import BrickPilot
token = f'{os.environ.get("DATABRICKS_TOKEN")}'
codegen_url = '<code generation model endpoint>'
explain_url = '<code summarization model endpoint>'
#Instantiate the class
autocoder = BrickPilot(token, codegen_url, explain_url)
#Example prompts here. Can be anything
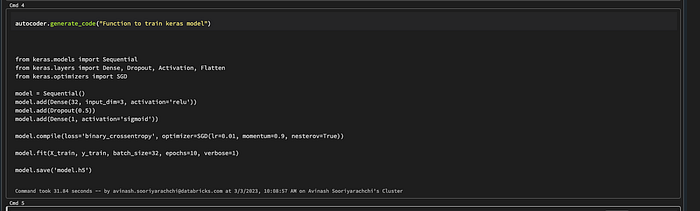
autocoder.generate_code("Function to Print a message with a given name")
autocoder.explain_code("def hello(name):\n print(name)")You can see this in action below (PS: Yes, if you didn’t know: Databricks has a dark mode!):
As you can see, we developed the entire system in VS Code and we now leverage in the Databricks Notebook environment. I could’ve had the same example running in Google Colab without an issue.
Our BrickPilot can spit out some more complex code too:
Even more meta: Using an AI coding assistant to create a (mini- DIY) coding assistant to create more AI.
The code for reproducing this entire example is in the repository here.
Although this is a simple example, I hope you see how you can build any AI-based system you can imagine on Databricks, the best platform for Data and AI, while using some of the best developer tools in the ecosystem, VS Code + Copilot.
